Introduction
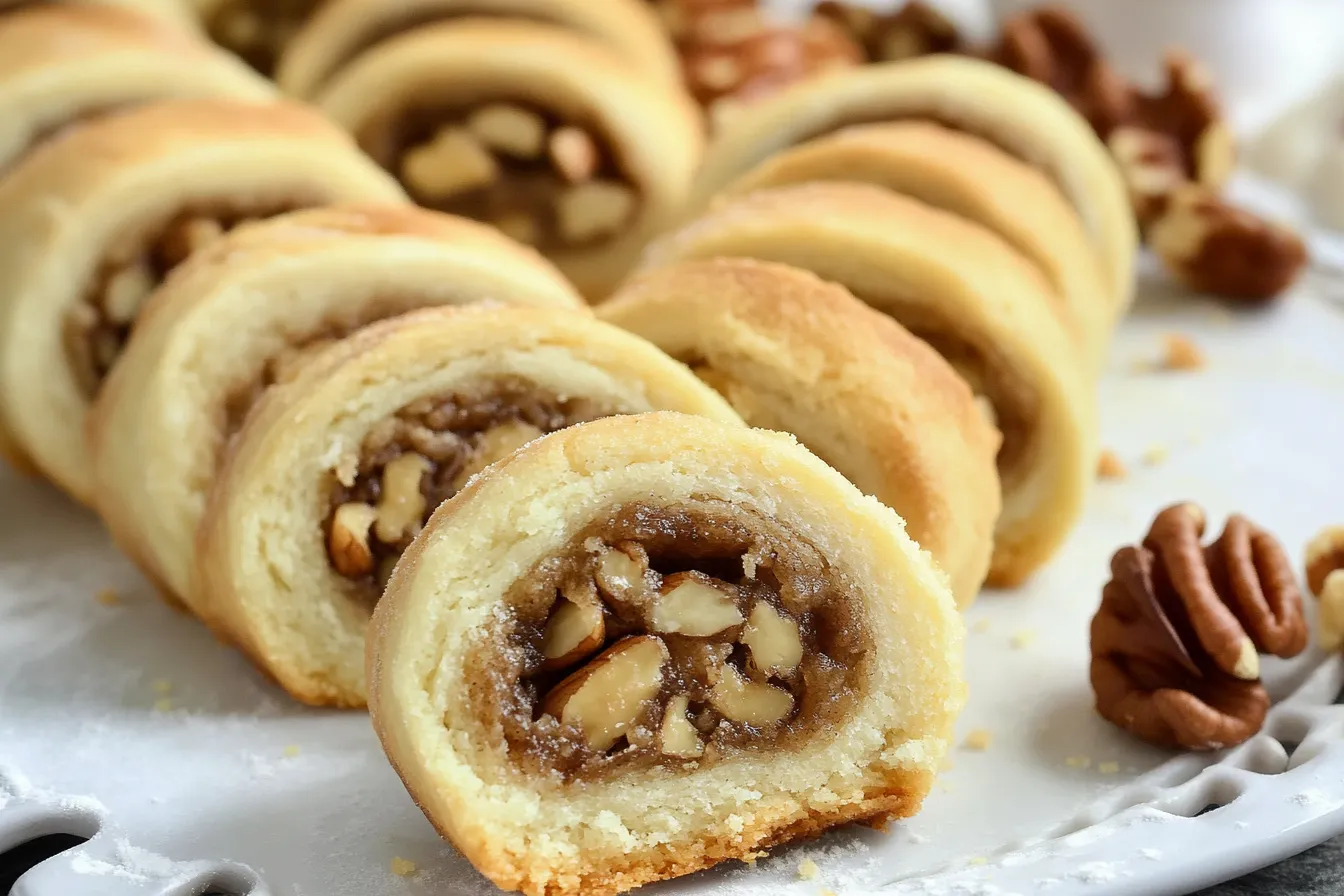
There’s something special about traditional Italian Nut Roll Cookies—a recipe passed down through generations, filling kitchens with the warm, nutty aroma of cinnamon and toasted walnuts. These delicate, buttery pastries wrap a rich, spiced nut filling in a soft, flaky dough, making them a perfect treat for holidays, family gatherings, or a simple afternoon indulgence.
Growing up, these cookies were a staple at every celebration, carefully rolled and baked to golden perfection. With their crisp yet tender texture and just the right amount of sweetness, they pair beautifully with a cup of coffee or tea. Whether you’re new to Italian baking or continuing a family tradition, this step-by-step guide will help you create authentic Italian Nut Roll Cookies that taste just like Nonna used to make.
Ready to bake? Let’s dive into what makes this recipe a timeless favorite!
Why You’ll Love This Italian Nut Roll Cookies Recipe
These cookies combine buttery dough and a perfectly spiced nut filling for an irresistible treat. Here’s why these cookies deserve a place in your baking rotation:
1. Authentic Yet Easy
Using traditional Italian dough, these cookies bake up soft and flaky. The rich walnut, brown sugar, and cinnamon filling creates a warm, classic flavor.
2. Perfect for Any Occasion
Great for holidays, gifting, or everyday treats, they pair beautifully with coffee or tea.
3. Make-Ahead Friendly
Both the dough and cookies store well, making them perfect for busy schedules. Refrigerate or freeze them to enjoy fresh-baked cookies anytime!
4. Customizable & Versatile
Not a walnut fan? Swap in pecans, almonds, or even chocolate chips! If you love nutty flavors in baked goods, check out these Pistachio Muffins, which bring out the rich, buttery taste of pistachios in a soft, fluffy muffin. Want extra indulgence? Drizzle the cookies with icing for a sweet finishing touch.
Now that you know why these cookies are so special, let’s take a look at the essential tools you’ll need before baking!
What You’ll Need to Make Italian Nut Roll Cookies
Before getting started, having the right tools will make the baking process smooth and enjoyable. Here’s what you’ll need:
Essential Kitchen Equipment
- Mixing Bowls – One for the dough and another for the nut filling.
- Electric Mixer – Helps achieve a smooth, fluffy dough.
- Rolling Pin – Essential for rolling out the dough evenly.
- Floured Surface or Pastry Mat – Prevents the dough from sticking while rolling.
- Baking Sheet – Covered with parchment paper to ensure the cookies bake evenly.
- Sharp Knife or Dough Cutter – For slicing the rolled dough into cookies.
- Pastry Brush – Helps spread milk or egg wash for a golden finish.
- Cooling Rack – Allows cookies to cool evenly after baking.
Now that you have the right tools ready, let’s move on to the key ingredients that bring this recipe to life!
Ingredients for Italian Nut Roll Cookies
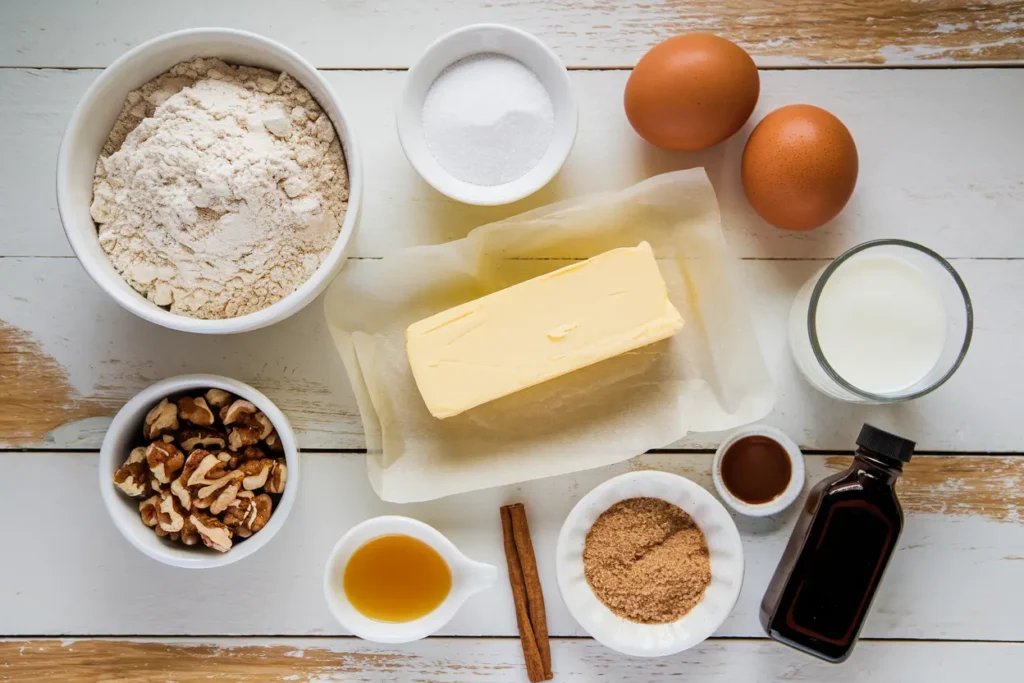
These Italian Nut Roll Cookies are made with a buttery dough and a sweet, nutty filling. Below is a complete list of ingredients to ensure the perfect balance of flavors and textures.
Dough Ingredients
- 3 cups all-purpose flour – Provides structure to the cookies.
- 1 cup unsalted butter (softened) – Creates a tender, flaky texture.
- ½ cup granulated sugar – Adds subtle sweetness to the dough.
- 2 large eggs – Acts as a binder to hold the dough together.
- 1 teaspoon vanilla extract – Adds subtle sweetness and depth of flavor.
Nut Filling Ingredients
- 2 cups walnuts (finely chopped) – The star ingredient for a rich, nutty flavor.
- ½ cup brown sugar – Adds sweetness and depth to the filling.
- 1 teaspoon cinnamon – Infuses warmth and spice.
- ¼ cup milk – Helps create a spreadable filling consistency.
For Assembly & Baking
- Flour (for rolling) – Prevents the dough from sticking.
- 1 egg (for egg wash, optional) – Adds a golden finish to the cookies.
With all the ingredients gathered, it’s time to start making these delicious cookies! Now, let’s walk through each step of the recipe.
How to Make Italian Nut Roll Cookies
This classic Italian nut roll cookie recipe is simple to follow, but chilling the dough and rolling it correctly are key to achieving the perfect texture. Here are the detailed instructions to guide you through each step for perfect results.
Prep Time: 30 minutes
Chill Time: 1 hour
Cook Time: 20 minutes
Total Time: 50 minutes
Servings: Makes about 24 cookies
1. Prepare the Dough
In a large bowl, cream together the softened butter and granulated sugar until the mixture is smooth and fluffy. Mix in the eggs individually, beating thoroughly after each one. Stir in the vanilla extract. Slowly incorporate the flour, mixing until a soft, cohesive dough forms.
2. Chill the Dough
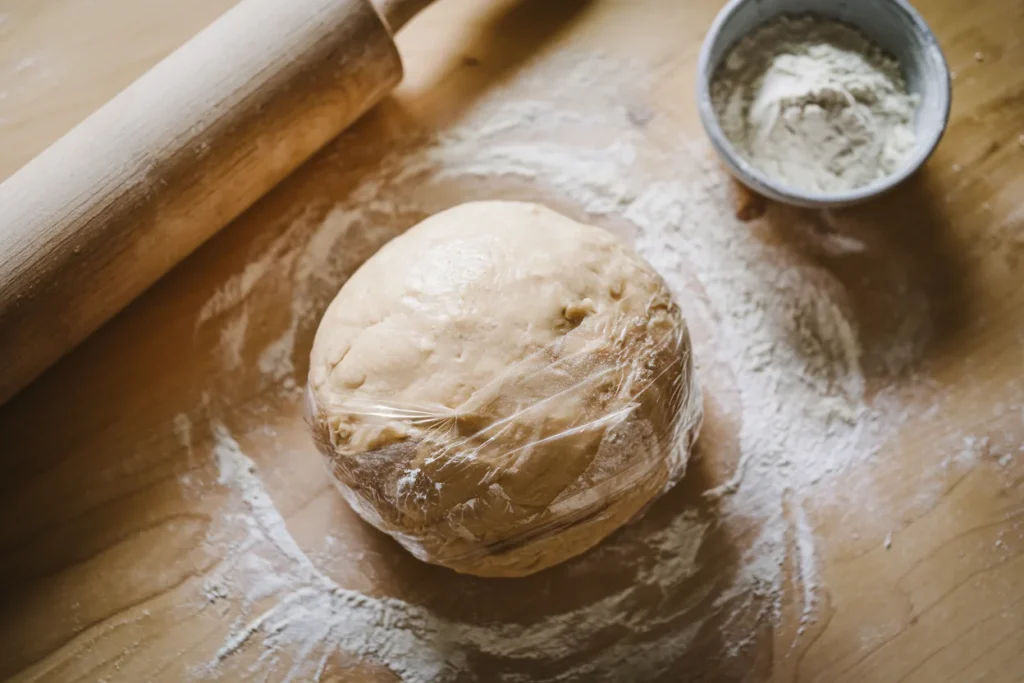
Wrap the dough securely in plastic wrap, then chill in the refrigerator for a minimum of 1 hour. Chilling helps solidify the butter, making the dough easier to roll while preventing it from becoming too sticky. For more expert tips on why and how to chill cookie dough effectively, check out this comprehensive guide from Food Republic.
3. Make the Nut Filling
In a separate bowl, combine the finely chopped walnuts, brown sugar, and cinnamon. Stir in the milk until the mixture is evenly moistened and holds together slightly.
4. Roll Out the Dough
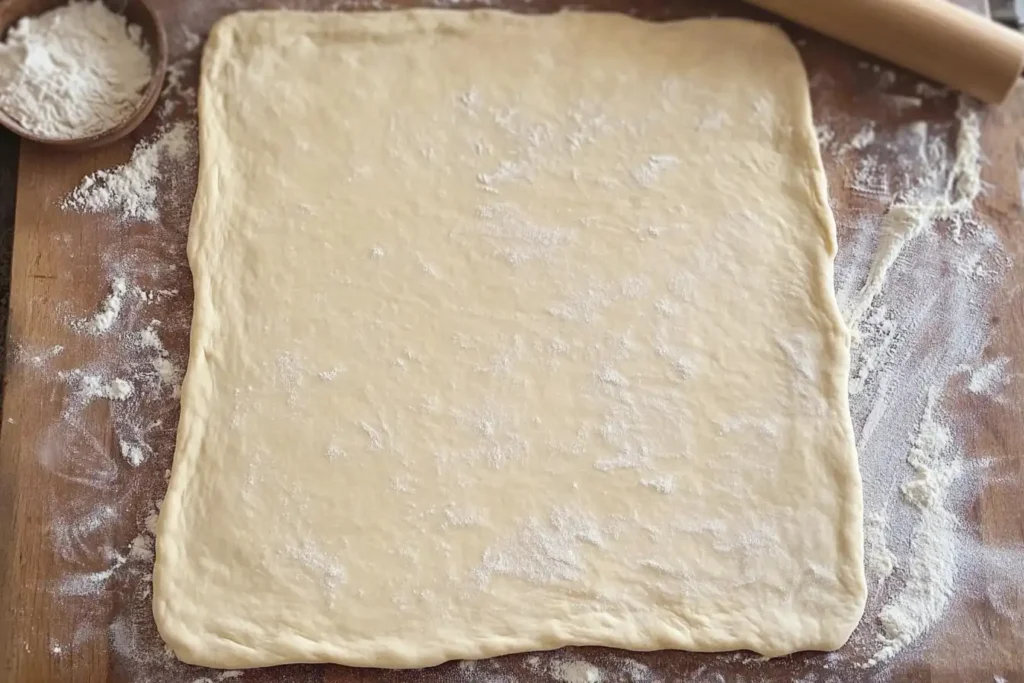
Lightly flour a clean work surface. Divide the chilled dough into two portions. Roll each portion into a thin rectangle (about ¼-inch thick).
5. Spread the Filling
Evenly distribute half of the nut filling over each rolled-out dough rectangle, leaving a small border around the edges.
6. Roll and Slice
Beginning at the longer edge, carefully roll the dough into a firm, compact log. Using a sharp knife, cut the dough log into slices about 1 inch thick.
7. Bake the Cookies
Preheat your oven to 350°F (175°C). Line a baking sheet with parchment paper. Place the sliced cookies on the baking sheet, spacing them about 1 inch apart. If desired, brush the tops with a light egg wash for a golden finish.
Bake for 18–20 minutes, or until the edges turn golden brown.
8. Cool & Serve
Allow the cookies to rest for a few minutes on the baking sheet before moving them onto a cooling rack. Serve warm or at room temperature, alongside your favorite coffee or tea.
Now that your cookies are baked to perfection, let’s go over some tips & hacks to make them even better!
Tips & Hacks for Perfect Italian Nut Roll Cookies
Want flawless Italian Nut Roll Cookies? Follow these expert tips:
- Chill the Dough – Refrigerate for at least 1 hour to make rolling easier and prevent spreading.
- Roll Evenly – Keep the dough ¼ inch thick for uniform baking.
- Use a Serrated Knife – This keeps the filling intact when slicing.
- Try Different Nuts – Swap walnuts for pecans, almonds, or hazelnuts for variety.
- Lightly Flour the Surface – Too much flour can dry out the dough.
- Add Citrus Zest – A teaspoon of orange or lemon zest enhances the flavor.
- Make Ahead – Dough stays fresh 3 days in the fridge or 3 months in the freezer—just thaw before rolling.
- Glaze for Extra Sweetness – Drizzle with a powdered sugar glaze for a bakery-style touch.
These simple tricks guarantee buttery, nutty, and delicious cookies every time! Now, let’s go over the nutrition breakdown before moving on to serving and storage.
Nutrition Score (Per Cookie)
Understanding the nutritional breakdown of Italian Nut Roll Cookies can help you enjoy them while keeping track of your dietary needs. Here’s an approximate estimate per cookie:
- Calories: ~150 kcal
- Carbohydrates: 18g
- Protein: 3g
- Fat: 8g
- Saturated Fat: 4g
- Sugar: 10g
- Fiber: 1g
- Sodium: 30mg
Key Nutritional Benefits
- Good Source of Healthy Fats – Walnuts provide heart-healthy omega-3 fatty acids.
- Lower in Sugar – Compared to frosted cookies, these are naturally sweetened with nuts and brown sugar.
- Customizable – Swap in alternative sweeteners or whole wheat flour for a healthier version.
These cookies strike a perfect balance between sweet, nutty, and satisfying without being overly indulgent. Now, let’s go over the best ways to serve and store them for maximum freshness!
Serving & Storage
How to Serve Italian Nut Roll Cookies
These cookies are incredibly versatile and pair well with different accompaniments. Here are some serving ideas:
- With Coffee or Espresso – Their nutty sweetness complements the bold flavors of Italian coffee.
- As a Dessert Platter Addition – Serve alongside biscotti and amaretti for an authentic Italian cookie spread.
- With a Dusting of Powdered Sugar – Lightly sprinkle with powdered sugar for an elegant finish.
- Paired with Ice Cream – Crumble them over vanilla gelato or coffee ice cream for a delicious contrast.
How to Store Italian Nut Roll Cookies
To keep your cookies fresh and flavorful, follow these storage tips:
- Room Temperature – Keep cookies fresh by placing them in an airtight container for up to one week.
- Refrigeration – If you prefer a firmer texture, refrigerate in a sealed container for up to 2 weeks.
- Freezing – These cookies freeze nicely for up to three months. Just keep them stored securely in a freezer-safe bag and let them thaw at room temperature before enjoying.
Delicious Variations of Italian Nut Roll Cookies
Italian Nut Roll Cookies are a classic, but they can be easily customized! Experiment with these variations to give the cookies a unique twist:
- Chocolate Nut Rolls: Add ¼ cup mini chocolate chips to the filling and drizzle melted dark chocolate over cooled cookies.
- Honey-Walnut Rolls: Swap brown sugar for honey in the filling and add ½ tsp nutmeg for warmth.
- Glazed Nut Rolls: Drizzle a simple glaze (powdered sugar, milk, and vanilla) over baked cookies for a bakery-style finish.
- Vegan Nut Rolls: Use vegan butter, almond milk, and a flaxseed egg (1 tbsp flaxseed + 2.5 tbsp water) for a plant-based option.
- Almond-Pistachio Rolls: Replace walnuts with almonds and pistachios, and add ¼ tsp almond extract for a refined flavor.
- Cinnamon Sugar Rolls: Sprinkle cinnamon sugar before baking and mix in chopped pecans for extra crunch.
These variations let you personalize the classic Italian Nut Roll Cookies while keeping their traditional charm!
Frequently Asked Questions About Italian Nut Roll Cookies
1. What cookies stay fresh for a long time?
Cookies with a low moisture content, such as shortbread, biscotti, and gingerbread, tend to stay fresh the longest. When stored in an airtight container at room temperature, these cookies can last for up to two weeks. For even longer storage, freezing is a great option, preserving their texture and flavor for several months.
2. Can Italian wedding cookies be frozen?
Yes! Italian wedding cookies freeze exceptionally well. To maintain their delicate texture, store them in an airtight, freezer-safe container for up to 3 months. When you’re ready to eat them, leave them at room temperature until fully thawed. For extra freshness, you can lightly dust them with powdered sugar after thawing.
3. How big do you roll cookies?
For the perfect shape and texture, roll the dough into a ¼-inch thick rectangle before spreading the nut filling. Once rolled into a log, slice into 1-inch pieces before baking.
4. Should dough for cut-out or rolled cookies be chilled thoroughly before rolling?
Absolutely! Chilling the dough for at least 1 hour makes it easier to roll out and prevents spreading in the oven. This step ensures clean cuts and helps maintain the cookies’ delicate texture.
Conclusion
Italian Nut Roll Cookies are a timeless treat that bring warmth and nostalgia to any occasion. With their buttery dough and sweet, nutty filling, these cookies are perfect for holidays, celebrations, or simply enjoying with a cup of coffee.
The best part? They’re easy to make, store well, and can be customized with different nuts, fillings, or glazes. Whether you follow the classic recipe or try one of the delicious variations, these cookies are sure to impress family and friends.
Now that you have the perfect authentic Italian Nut Roll Cookie recipe, it’s time to start baking! Gather your ingredients, roll out the dough, and enjoy a taste of Italy in every bite.